by Budd Churchward - WB7FHC - NIBBLES AND BITS LIBRARY
'My Dog Has Fleas' - A Binary Music Machine
« 1 2 3 4 5 6 7 8 9 10 11 12 »
|
|
by Budd Churchward - WB7FHC - NIBBLES AND BITS LIBRARY 'My Dog Has Fleas' - A Binary Music Machine« 1 2 3 4 5 6 7 8 9 10 11 12 » |
Section 5 - Populating the Breadboard
|
We are building a Music Machine while we learn about making sounds and further
explore the advantages of manipulating bits in binary numbers.
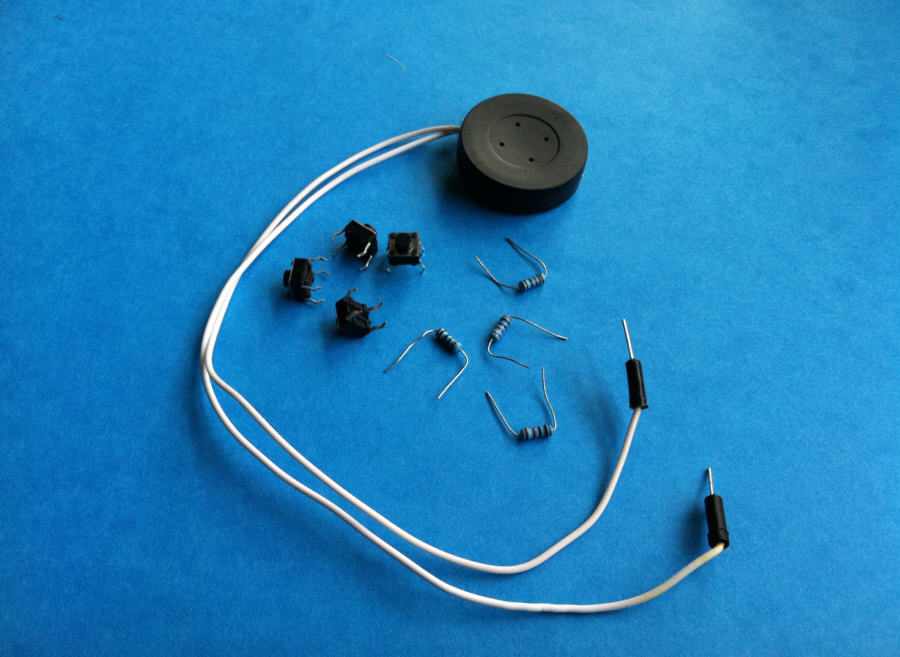
So here is a quick review of the components we will need:
|
|
|
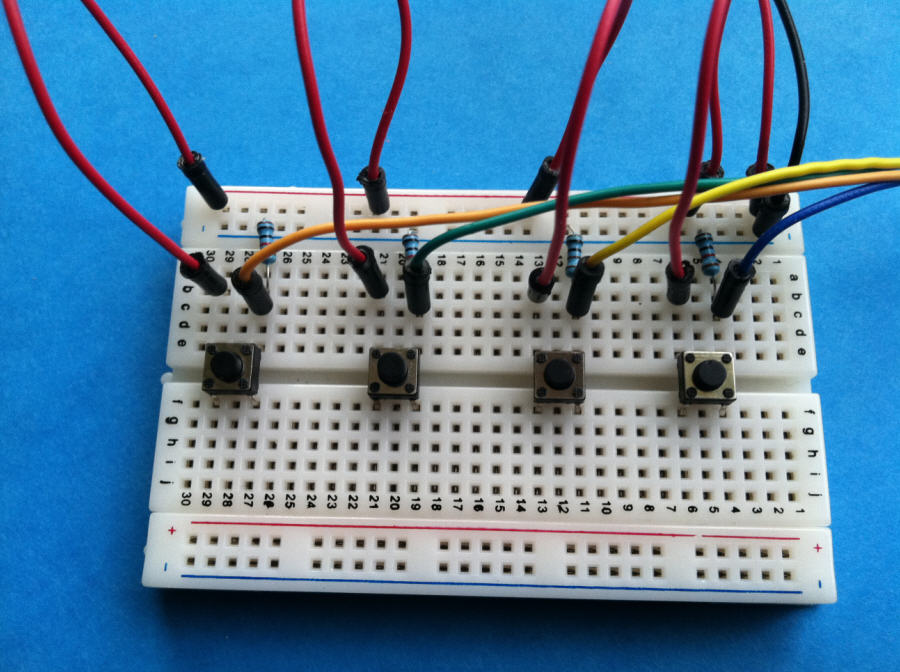
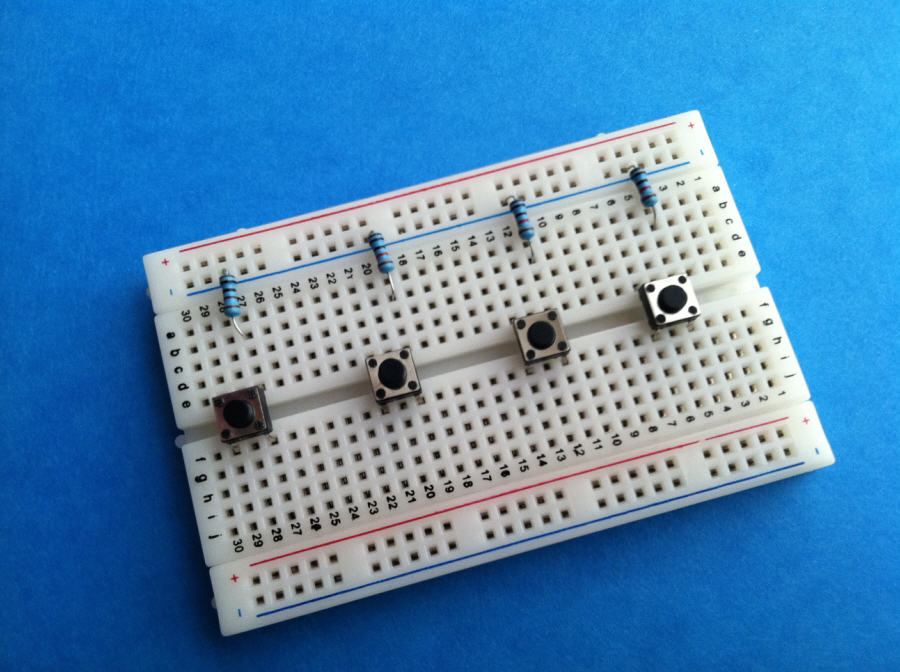
Start by carefully pressing the push buttons into your board.
They should straddle the center gap. The pins that
point towards each other are the same switch terminal.
 Note: this links the gangs of points on opposite sides of the board as shown. Click the image on the right to enlarge the view. You will see that each of the resistors is linked to one pin at its own button. The other end of the resistor hooks into the ground bus that runs the full length of the edge of our board. |
|
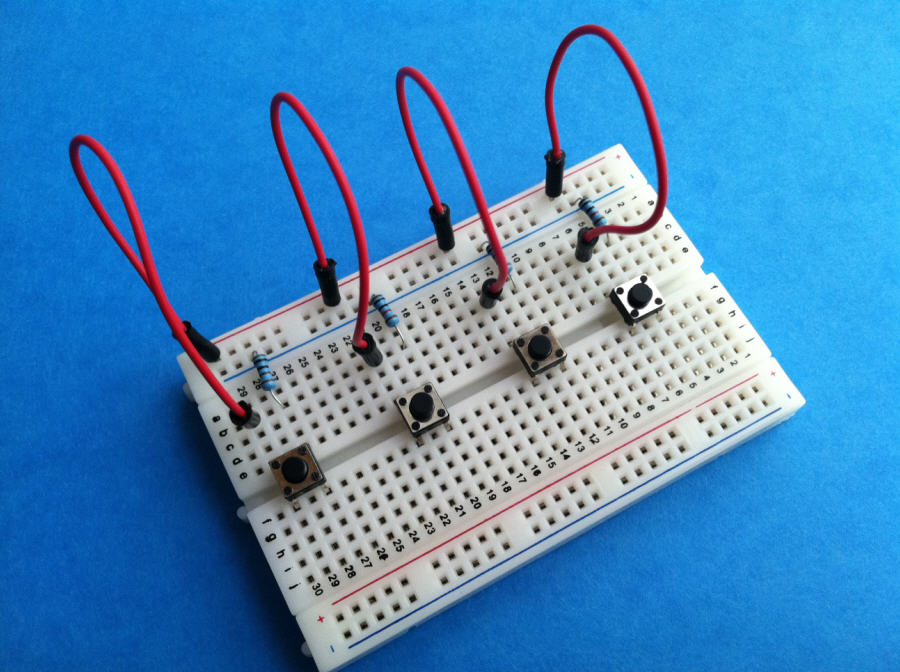
| Next we want to connect the other side of each switch to our 5v bus. I have done that here with four red jumpers. |
|
|
I have added a red and a black jumper to the end of the 5v bus and the ground bus.
These will connect to the power side of Arduino later. Click the image on the right
for an enlarged and expanded view.
Having an assortment of color coded jumper leads is helpful. I am using red for all of the 5v connections. The grounds are all black. These are quick to find on eBay. If you have to use the same color for all of you connections problems easily happen and are harder to find. |
|
|
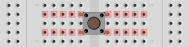
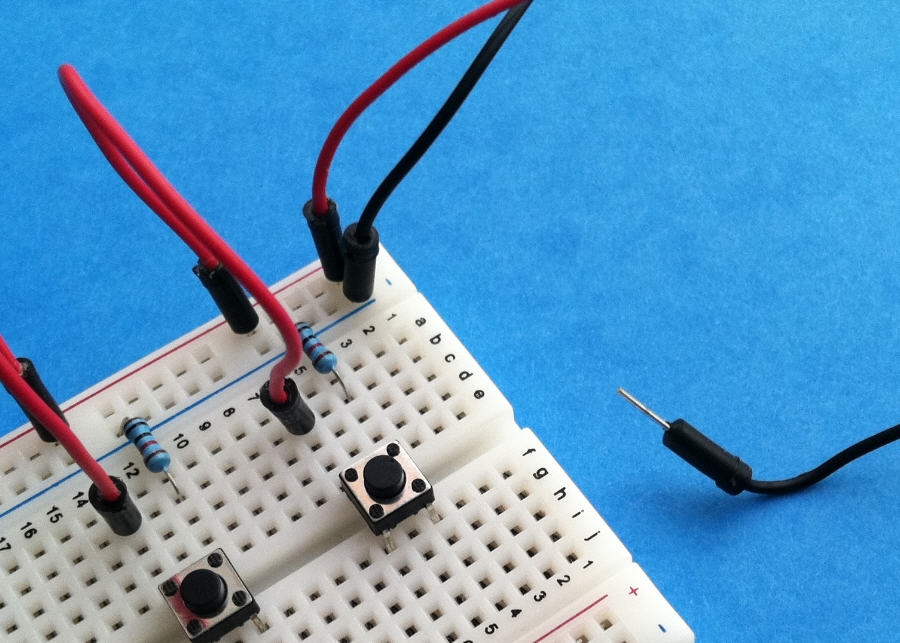
You can build a handy cable harness out of four colored jumpers. I plugged mine
in next to the bottom of the buttons to get the spacing right and then wrapped
a piece of tape around them to hold them in place.
We are going to want to do a bit of fancy fingering with our four buttons. I am trying to keep all the wires neatly contained on the far side of the breadboard so that they will be away from my granddaughters fingers when she plays her tunes. |
|
|
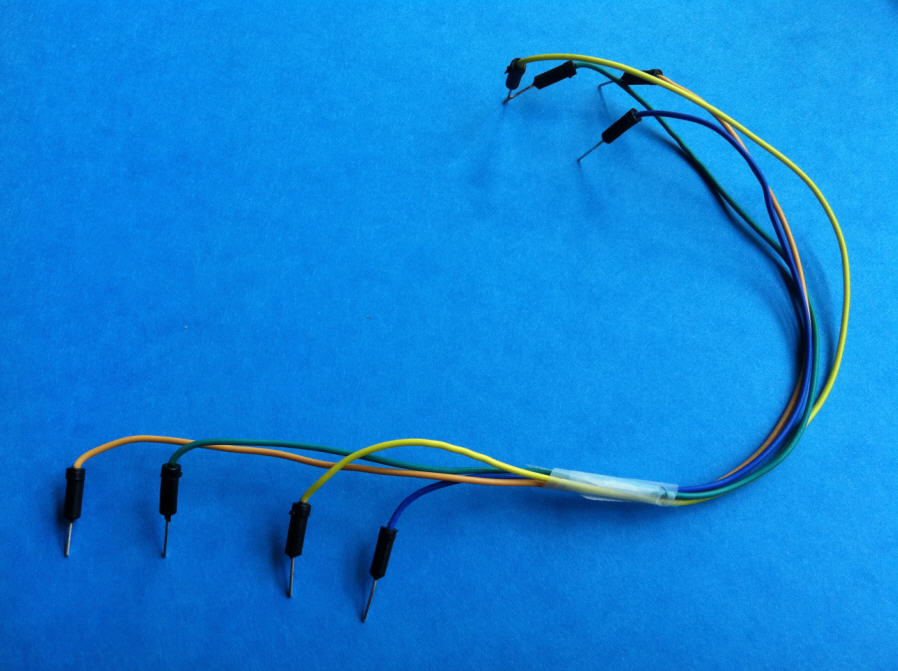
Feed your harness through the red 5v loops and press the pins in between each
of the pull down resistors and the right legs of your switches. The loops will keep these wires from drifting
toward your push buttons.
|
|
 The breadboard is ready to go. In the next section we will hook up Arduino's side
of the project.
The breadboard is ready to go. In the next section we will hook up Arduino's side
of the project.