The Care and Feeding of My Pet Arduino
by Budd Churchward - WB7FHC - NIBBLES AND BITS LIBRARY
Morse Code Oscillator
|
Nibbles and Bits
The Care and Feeding of My Pet Arduino by Budd Churchward - WB7FHC - NIBBLES AND BITS LIBRARY
«1 2 3 4 5 6 » |
Section 2 - Populating the Breadboard
|
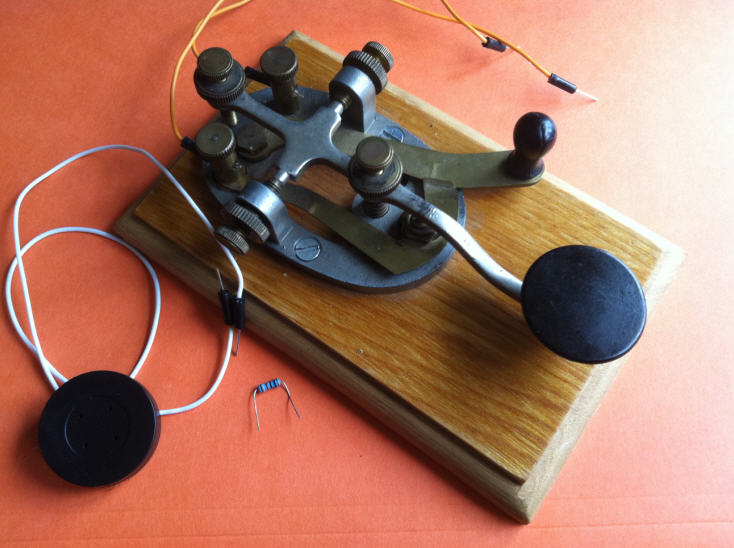
Our Oscillator is the first project that we will be creating in our Morse Code Series.
As you can see in the photo, we won't need many parts. We have a telegraph key. If you
can not find one, look back at Section One and see how you can build your own. You can
also use a mini push button switch.
The speaker you see in the photo is the same one we pirated out of an old telephone. Look at our Music Machine project to see how we came by this item for free! The only electronic component that we need is a 10K Ω pull down resistor. |
|
|
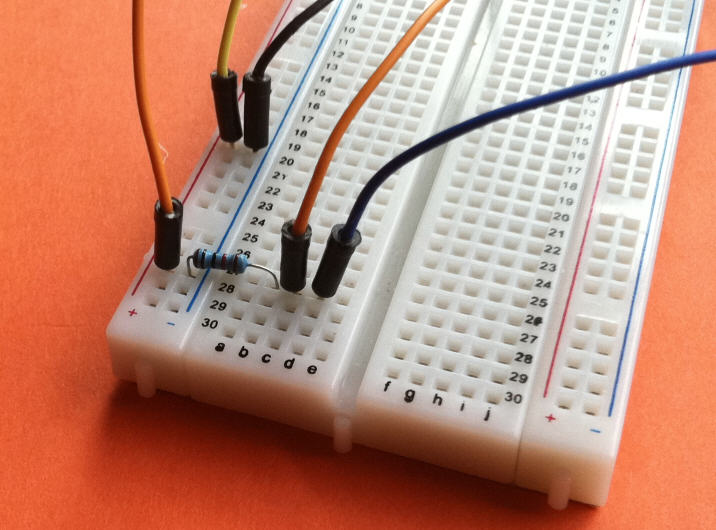
Connect one end of your resistor to the ground bus on your breadboard. The other end can
go into one of the points in the body of the board.
The two orange leads you see in the photo go to the two contacts on the telegraph key. One connects to the resistor, the other plugs into the 5v bus on the breadboard. The blue lead connects to our input jack on Arduino. Also on the busses you see yellow and black leads that connect to Arduino's 5v and ground. |
|
|
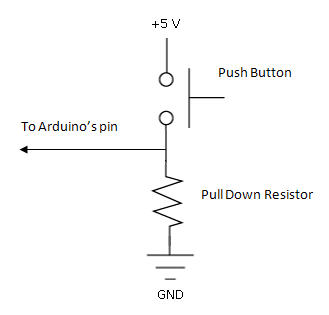
For this project, we are using a 10K Ω pull down resistor.
You can see how it is configured in the schematic on the right.
A wide range of values will work in this project. If you don't have 10K Ω resistors, try something else. I have made it work with resistors as low as 470 Ω, but something higher would be much better. The lower the value, the more current drawn. If you plan to power your project with a 9v battery, a lower value is going to shorten its life. In the next section we will hook the other ends of these leads to Arduino and add the speaker there, too. |
|