Nibbles and Bits
The Care and Feeding of My Pet Arduino


by Budd Churchward - WB7FHC - NIBBLES AND BITS LIBRARY
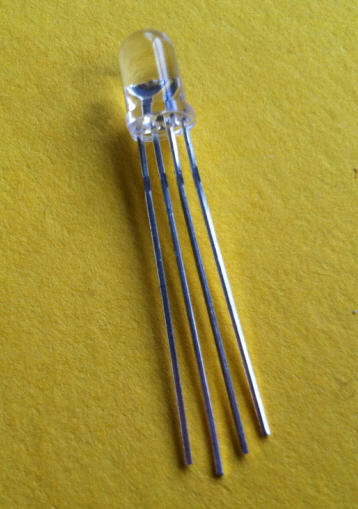
Sequencing RGB LEDs 
« 1 2 3 4  5  6 »


Section 5 - Writing the Sketch
Here is the complete sketch, fully documented, that you can copy and paste into your project. It is ready to run. To help you understand how and why it works, I will discribe the parts of the sketch below.
We start by declaring all of our variables. We use these to designate the OUTPUT pins from Arduino. I have chosen the sequence: 5 6 7 so that I can do simple arthmetic with the next variable:
      int red=5;   
      int green=6; 
      int blue=7;  

This variable, 'color', will change each time we press the button. It starts out as '7' which is the value we have assigned to the color 'blue'. We will increment the value of 'color' each time the button is pressed.
      int color=blue;  

Here we have declared 'button' as '11'. This is the pin we will use to read the INPUT from our switch. We also have declared 'val' where we will store the value we read from pin 11.
      int button=11; 
      int val=0;     

'didThis' is a Boolean variable that will be either TRUE or FALSE. When Arduino runs a sketch, he loops through our code over and over quite quickly. We have code that we want him to follow only once each time we press the button. We will use 'didThis' to tell him that he doesn't need to do something that he has already done.
      boolean didThis=false; 


Declare our OUTPUT and INPUT pins:
      void setup() 


This is where Arduino chases his tail.

      void loop() 

While he is spinning around here, we have him check our button:
     val=digitalRead(button); 
and then jump out of the loop and do one of two things:
      lightMyFire(); 
	    - or -  
      alloff();      


This is where we turn on the LED:
     void lightMyFire() {    

First we check to see if we have already done this. If we have we return back to loop
       if (didThis) return;

We make 'color' one higher. If it is higher than our top color, knock it back down to our bottom color.
      color++;                   
      if (color>blue) color=red; 

Turn on the our current color pin to light the LED
      digitalWrite(color,1); 

Now we set this value so we don't do this again.
      didThis=true; 


Here is where we turn the LED off. We are turning all of the colors off even though only one is on. The sketch is set up so you can experiment with the code to create different effects.
      void allOff() {          
        digitalWrite(red,0);   
        digitalWrite(green,0); 
        digitalWrite(blue,0);  

And finally, we flip our Boolean value so we can do it all again the next time the button is pressed.
      didThis=false; 

In the final section we have a video that demonstrates this project.

Next Section »


/* Barnacle Budd's Sequencing RGB LED demo v. 0.1
   (c) 2011, Budd Churchward - WB7FHC
   04-04-11
   
   Parts (in addition to Arduino and breadboard):
   1 RGB LED - 4 pin common cathode
   2 470 ohm resistors
   1 momentary switch (button)
   7 multi-colored jumper wires
   
   Hook up components as documented below
 */
   
int red=5;      // Red lead goes to pin 5
int green=6;    // Green, goes to pin 6
int blue=7;     // Blue goes to 7

int color=blue; // Start sequence with last color
                // We will bounce it back to red
                // the first time the button is pressed.

int button=11;  // Hook this pin to one side of the button
                // and a pull down resistor that goes to
                // ground. Hook the other side of the
                // button to 5v.
                
int val=0;      // Stores the state of the button:
                // 1 = ON 0 = OFF

boolean didThis=false;  // We use this so that we only
                        // execute the working loop once
                        // per click.


void setup() {
  pinMode (red,OUTPUT);    // We have stepped these values:
  pinMode (green,OUTPUT);  // 5, 6, 7 so we can do some simple
  pinMode (blue,OUTPUT);   // math with the value of 'color'
  
  pinMode (button, INPUT); // Connected with a pull down
                           // resistor to ground. When button
                           // is pressed the pin goes HIGH.
}


void loop() {
  val=digitalRead(button); // What is the state of the button?
  if (val==1) {            // Button is down
    lightMyFire();         // Go turn the LED on
  }
  else {                   // Button is up 
    allOff();              // Go turn the LED off
  }
  
  delay(20);               // weed out any key bounce
}


void lightMyFire() {
  if (didThis) return;    // If we have already turned the LED
                          // on, we don't want to do this again.
                          // Go back to loop() and wait for
                          // something new to happen.

  color++;                    // Bump the value up by one
                              // 5 - 6 - 7 ...
  if (color>blue) color=red;  // if it is 8, knock it down to 5
  
  digitalWrite(color,1);  // Send voltage to this pin on the LED
  
  didThis=true;           // Switch this value so we only do
                          // this stuff once per click.
}


void allOff() {
  digitalWrite(red,0);    // We are going to turn ALL of them
  digitalWrite(green,0);  // off, even though only one is on.
  digitalWrite(blue,0);   // This makes it easy to experiment
                          // with multi-colored options.
  
  didThis=false;          // Switch this value so we can do
                          // it all again with the next click.
}